
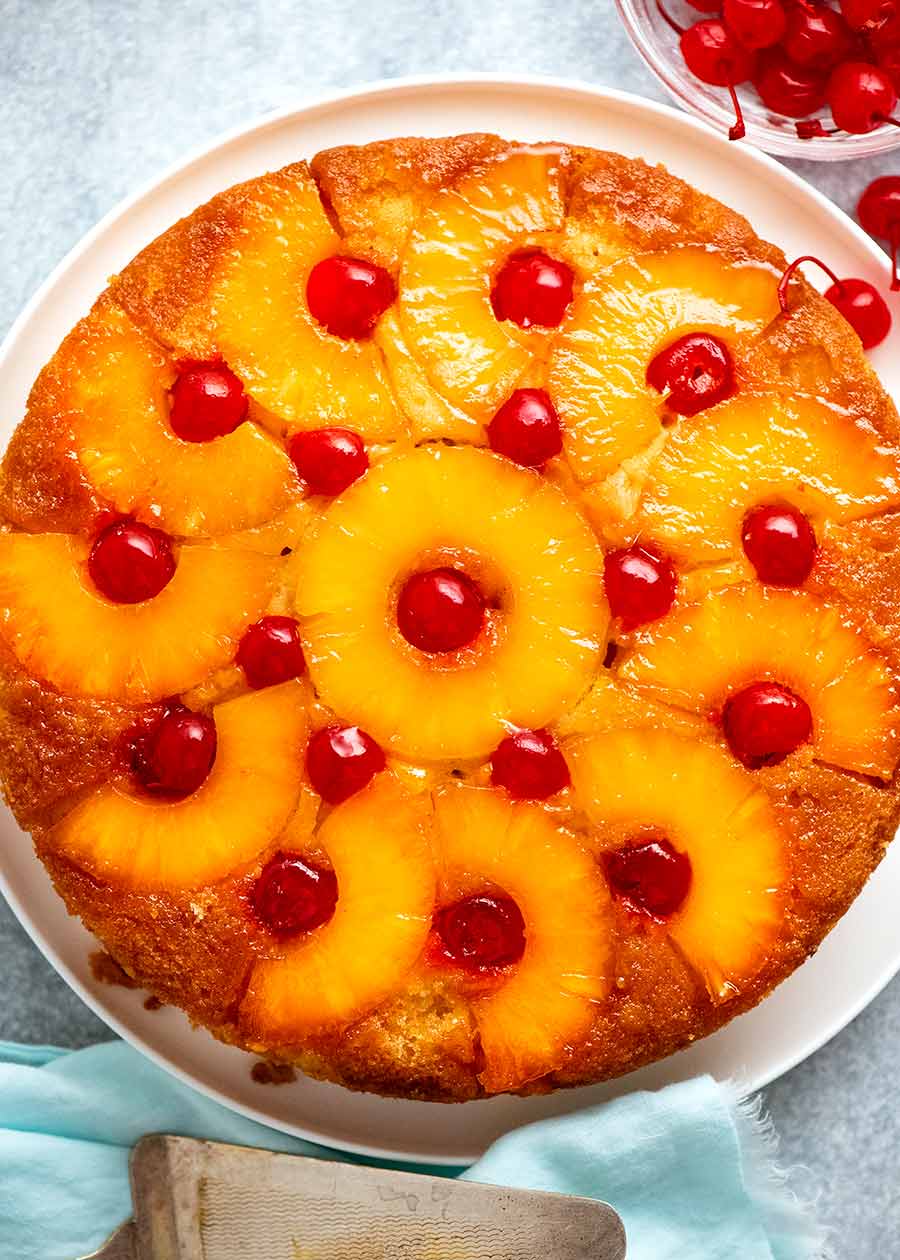
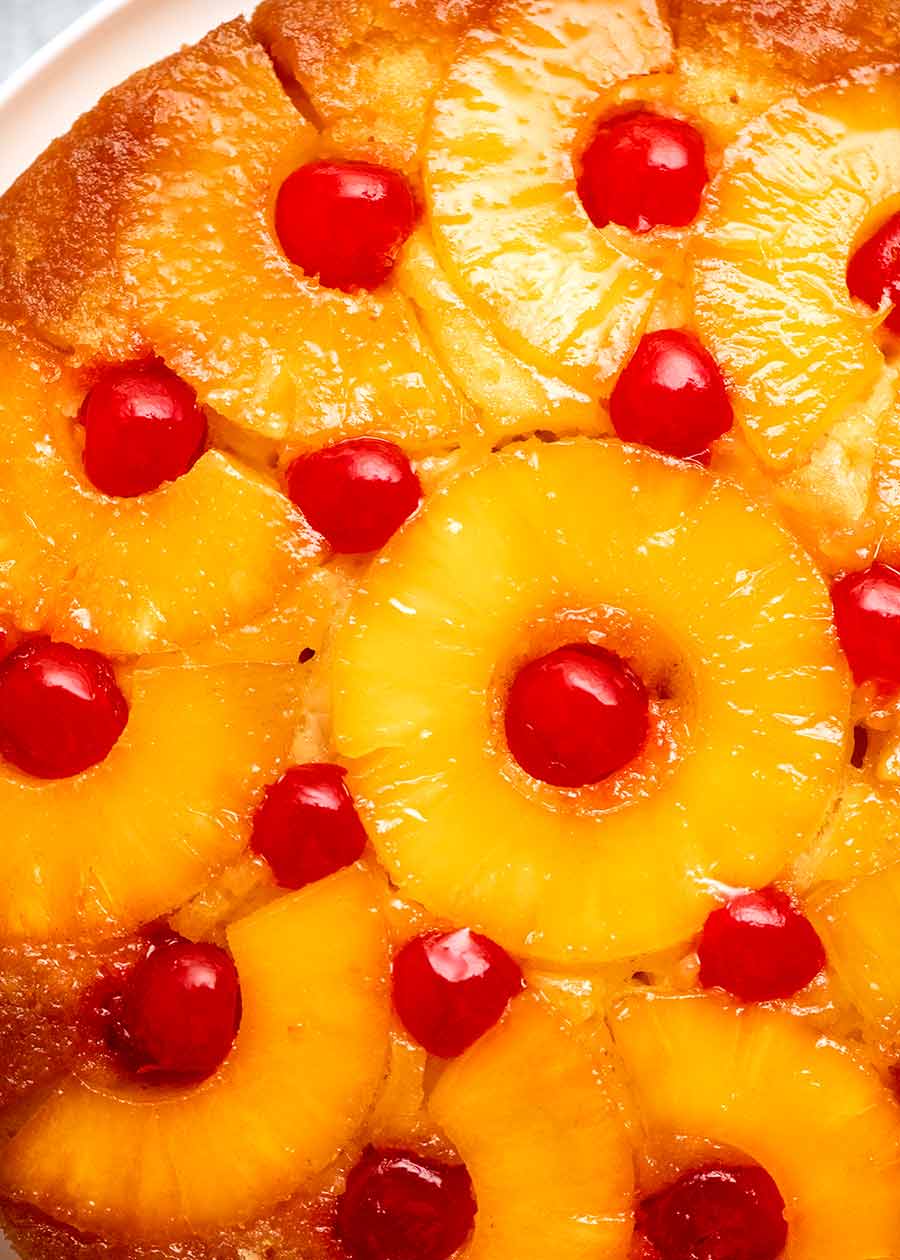
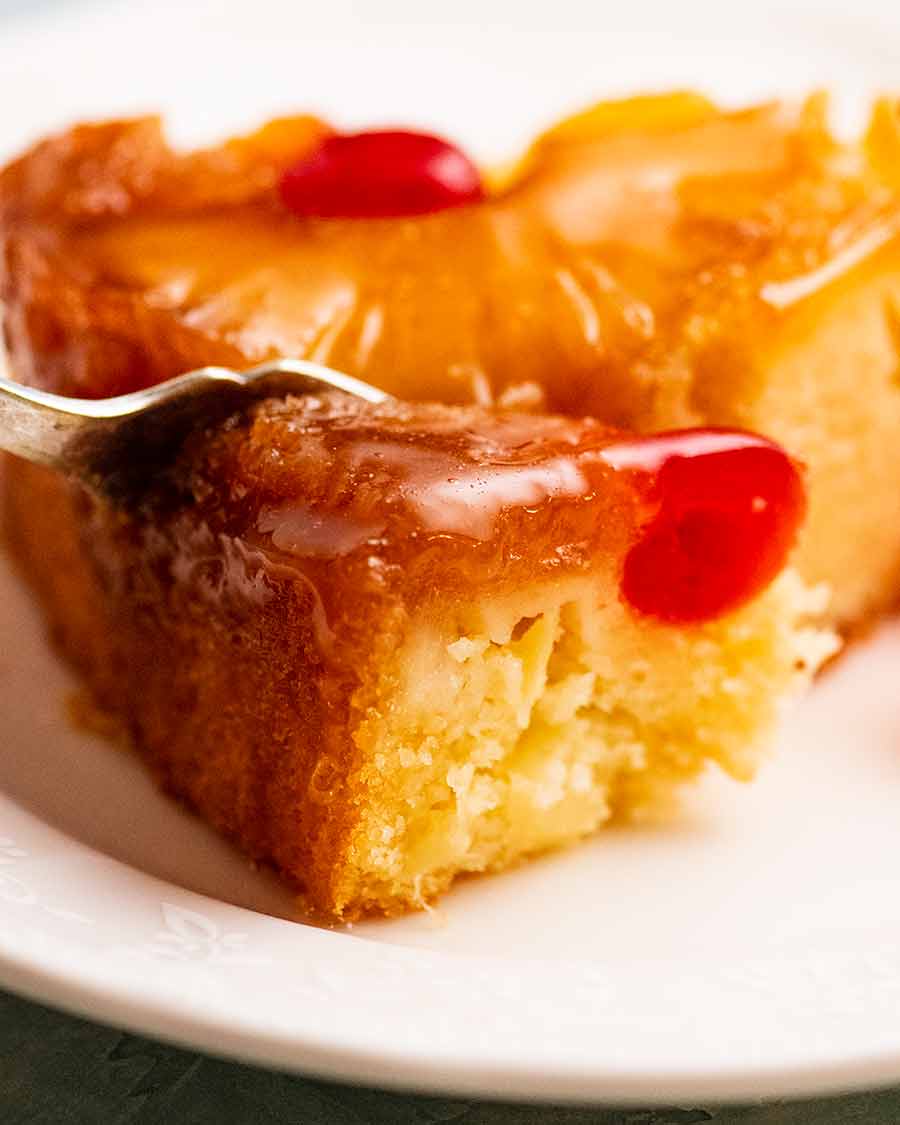
Bringing back the retro classic! You’ll love this Pineapple Upside Down Cake with the sticky caramelised edges on the pineapple. The ultra-moist, tender vanilla cake is studded with pineapple pieces and infused with pineapple juice. You can’t help but smile at the sight of this cheerful-looking cake. Right? 🙂
Pineapple Upside Down Cake
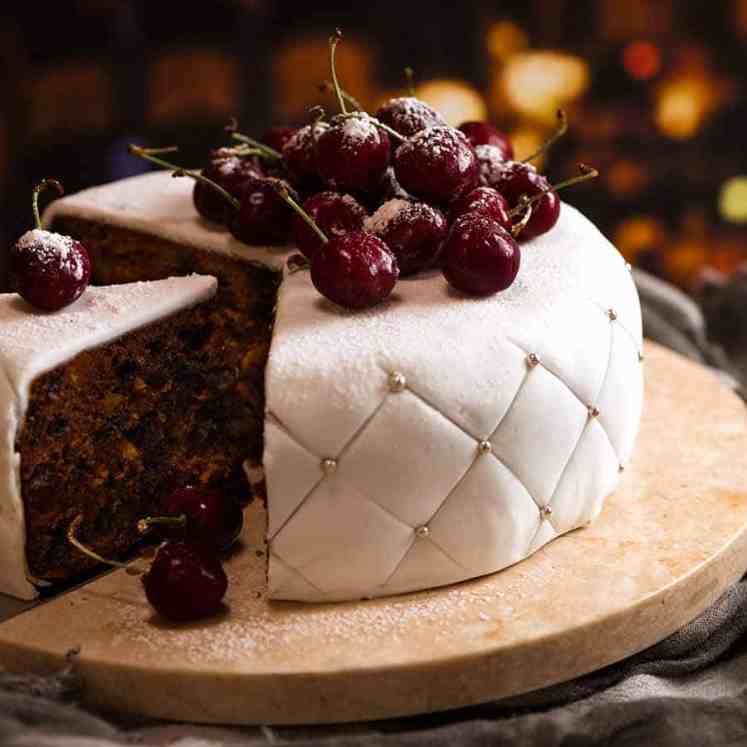
“Everything is brown!“, I observed, looking at the latest dessert recipes I’ve shared. “Chocolate, caramel, fruit cake – brown, brown, brown. Give me some COLOUR!”
And therein lies the exact reason I chose to share this cake today. A girl needs a splash of colour in her life every now and then, despite her commitment to all things chocolate.
And this girl needs little encouragement to bring retro fun into her life! Disco balls and flares, perms and … Apricot Chicken?? Hmm, I might pass on the Apricot Chicken!
Pineapple Upside Down Cake – What it tastes like
Pineapple Upside Down Cakes were all the rage from the 60’s right through the 80’s. Though as far as Aussies are concerned, they never went out of fashion. Rarely a summer would go by without one making an appearance at a barbie at some stage! (That’s a barbecue to you non-Aussies!)
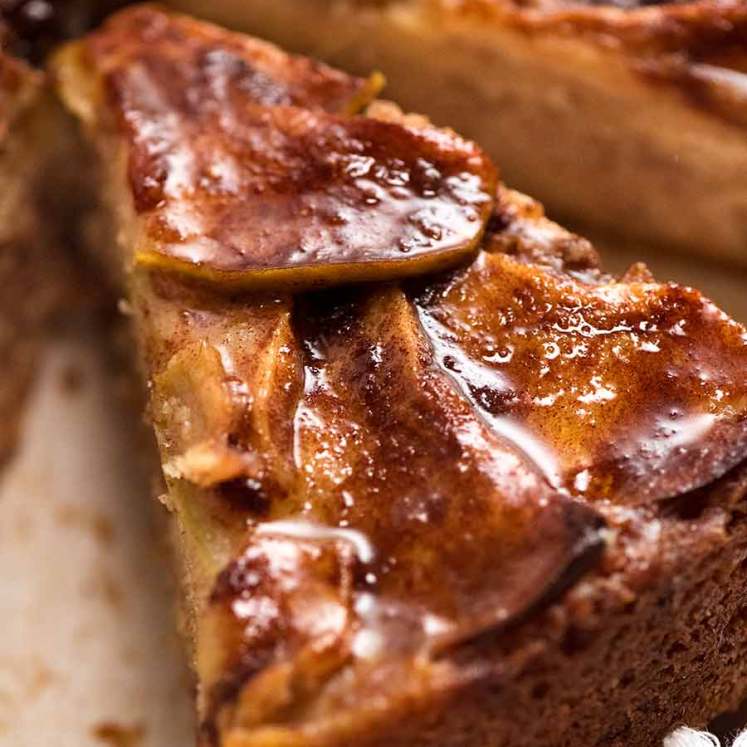
“Upside Down” refers to the way the cake is made. Like a French tarte tatin, the cake is assembled and baked with fruit at the bottom and the batter on top. To turn it out, you flip the cake upside down, leaving you with the glistening, caramel-napped fruit layer exposed and the cake underneath it – Upside Down Cake!
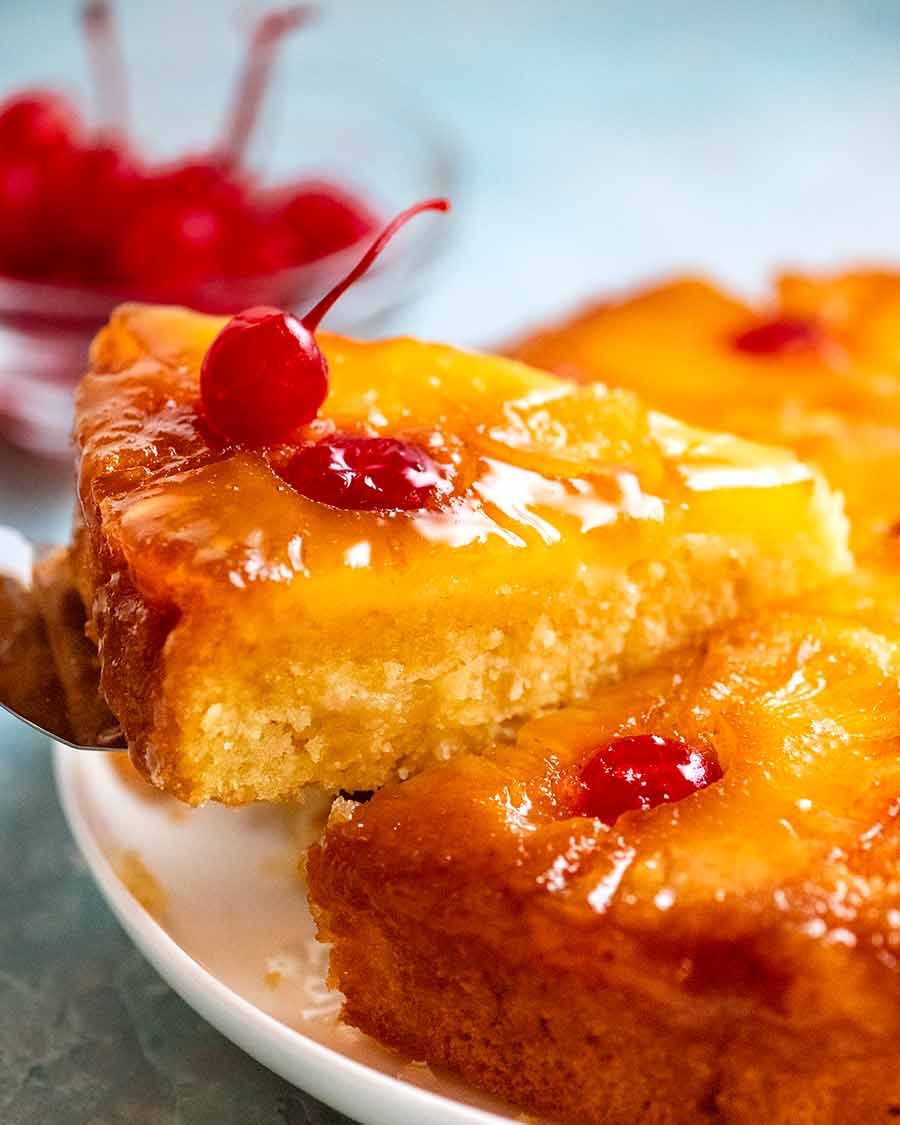
The cake part is a vanilla cake. You’ll see versions that are more on the pudding-like side (ie. quite dense and wet like syrup-soaked cakes) and others that are quite dry sponge cakes. Mine lies squarely in the middle. It’s soft and fluffy, like my classic Vanilla Cake (except this is faster to make), but it is a bit more moist than traditional cakes because of the juices from the pineapple (and we are all for those juices!).
As for that pineapple topping? Think juicy pineapple pieces with caramelised edges, studded with sweet candied cherries. It is literally the crowning glory of this cake!
What you need for Pineapple Upside Down Cake
Pineapple Cherry Topping
Here’s what you need for the signature pineapple-and-cherry-studded topping:
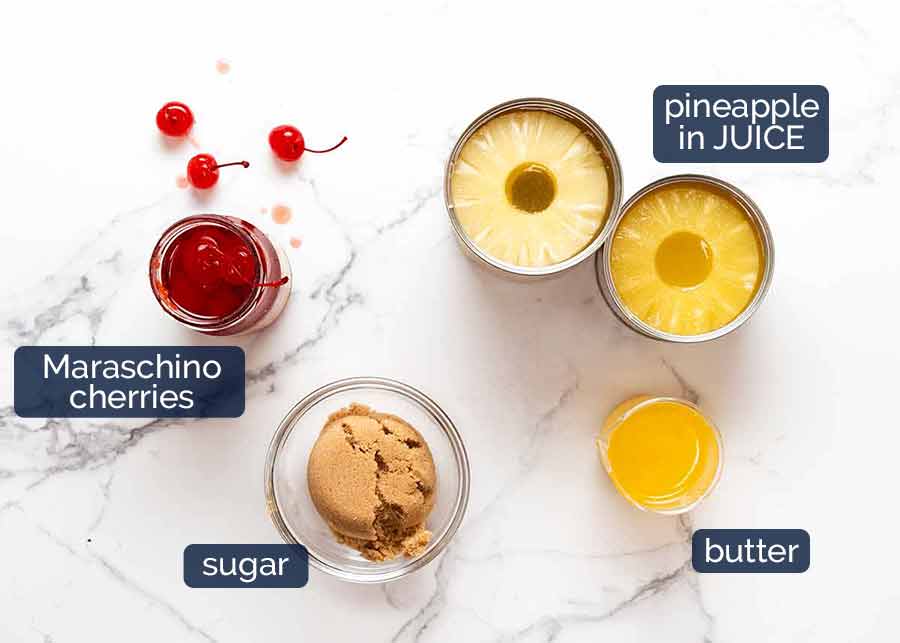
Pineapple slices in JUICE – Be sure to get canned pineapple slices in juice rather than syrup. Syrup is too sweet for our needs. Also, we use some of the juice for the batter – and we save the rest for cocktails!
The recipe calls for 600g/20oz of canned pineapple. Those of you in Australia will need 1 large can (425g) and 1 small can (225g) which together totals 650g. This is more pineapple than you need to cover the surface. So chop up leftovers and toss them into the batter!
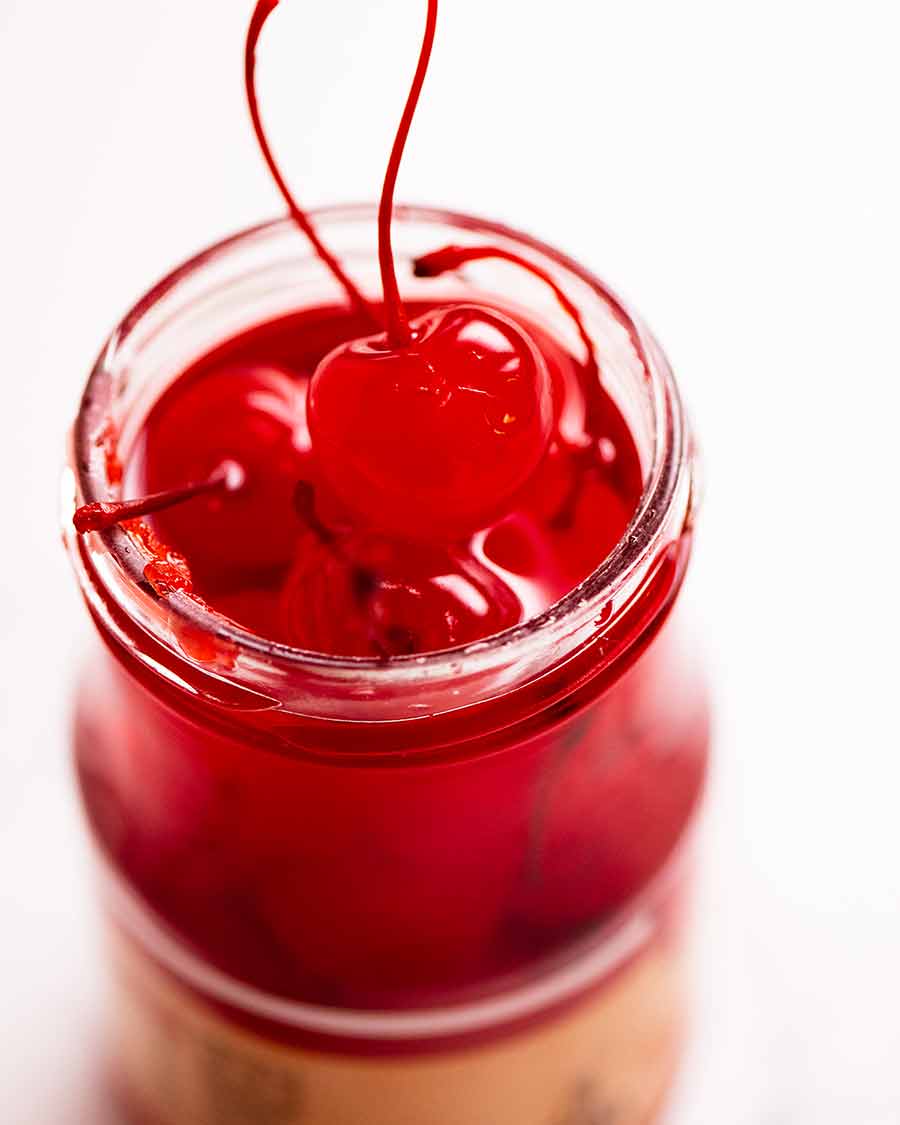
Maraschino cherries (image below) – These are preserved, sweetened cherries commonly used as a cocktail garnish, such as for a Tequila Sunrise, and desserts like Black Forest Cake. True maraschino cherries are marinated in a cherry liqueur called maraschino – hence the name. However these are expensive and hard to source, so mostly you’ll find cheaper substitutes that don’t use real maraschino. These are totally fine and actually better here for their vivid colour! Find it at liquor stores and some grocery stores, such as Harris Farms in Sydney. Substitute with glacé cherries; and
Butter and brown sugar – Together, these form the shiny caramel coating on the top of the cake.
Maraschino cherry 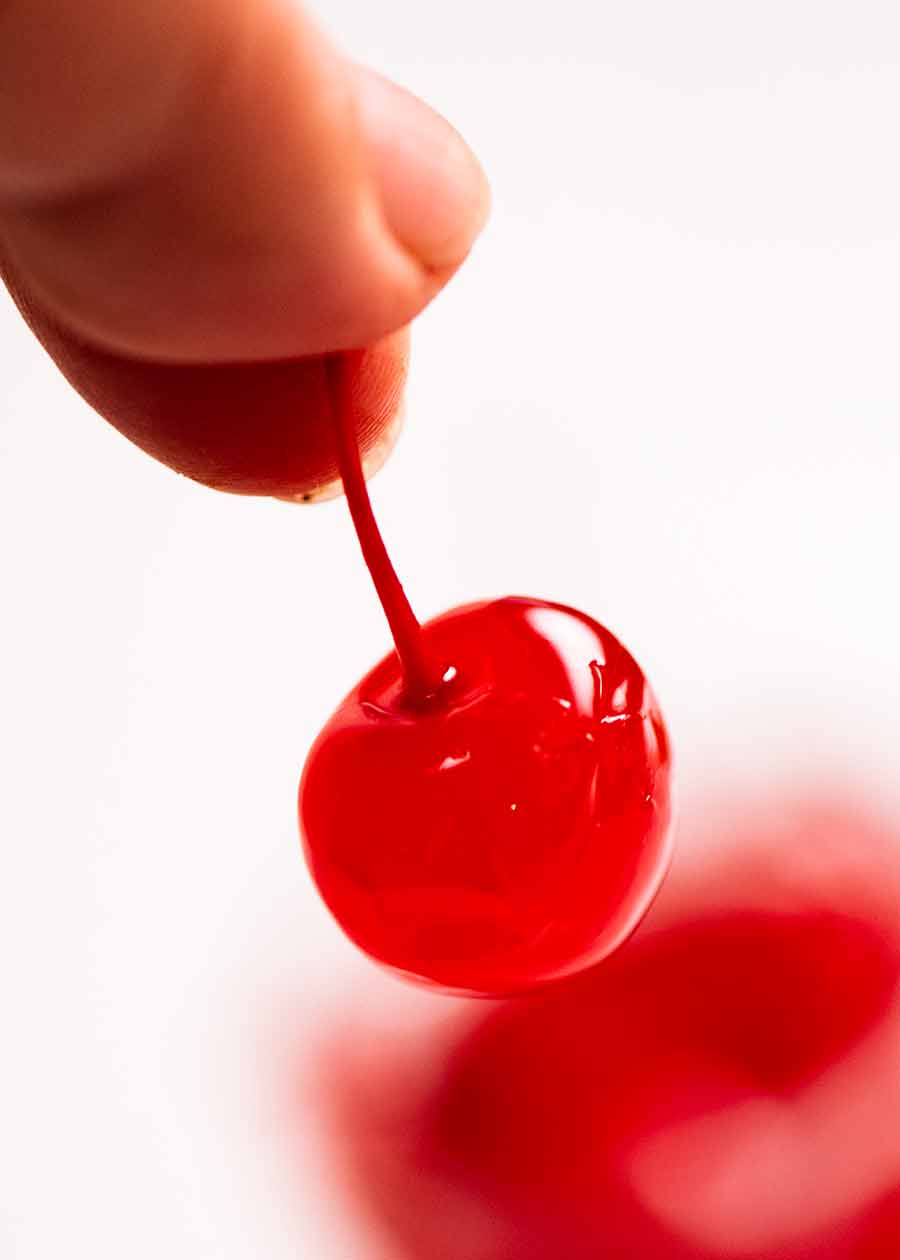
Cake Batter
Here’s what you need for the cake batter:
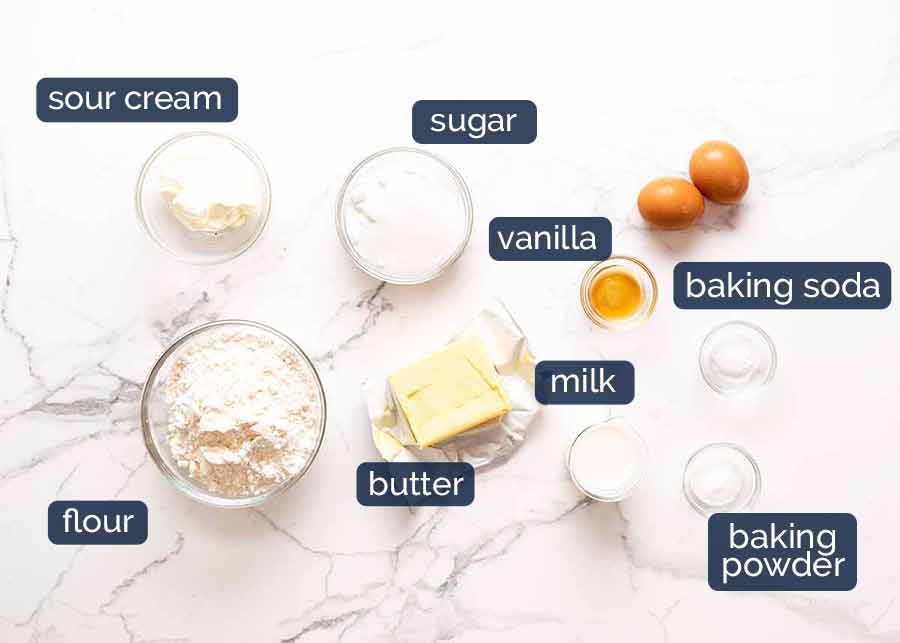
Flour – Just plain/all-purpose flour;
Sour cream – This is a neat baker’s trick to thicken the batter without adding more flour, keeping the crumb of the cake nice and moist. We need a thick batter for this cake so it doesn’t leak under the pineapple slices which would tarnish the look of the surface!
Sugar – White sugar, which makes a nice light coloured cake crumb;
Unsalted butter – Softened to room temperature (18°C/64°F). This is the temperature at which butter is pliable and can be beaten (creamed) so it’s nice and fluffy, which in turn means a fluffy cake.
If the butter is so soft that when you touch it, you end up with a thick slick of grease on your fingers, it is too soft. This will likely lead to a greasy cake, or one that does not rise as much as it should. If your butter is >20°C/68°F, I wouldn’t use it for a cake. Refrigerate to chill before using;
Large eggs, at room temperature – “Large eggs” are 55-60g / 2oz each, which an industry standard. Large eggs are sold in cartoons labelled as such.
It’s important to ensure the eggs are at room temperature before using in cakes to ensure they incorporate fully. Fridge-cold eggs added into a batter with butter in it can cause the butter to solidify – spelling disaster!
What is an egg at room temperature? Just take it out 30 minutes prior to using. As long as the egg is not fridge-cold when you hold it, it’s fine. There is more margin for error with eggs than there is with butter;
Baking soda AND baking powder – I always try to avoid the need for using both but sometimes it’s inevitable! Baking soda is like baking powder on steroids, it is 3x stronger. When combined with an ingredient with even a bit of acid in it (sour cream in this case), you get a great lift boost when the cake goes in the oven. This cake benefits from that extra boost because the batter is quite heavy. So unfortunately, we need both!
Milk – Any fat % is fine here, it’s not a major ingredient; and
Vanilla extract – This adds better flavour than vanilla essence, but essence is fine to use too.
How to make Pineapple Upside Down Cake
I feel like there’s a lot of process step photos below, which is quite misleading given how straightforward the recipe is. It’s not hard, I promise. 🙂
Part 1: Prepare pineapple topping
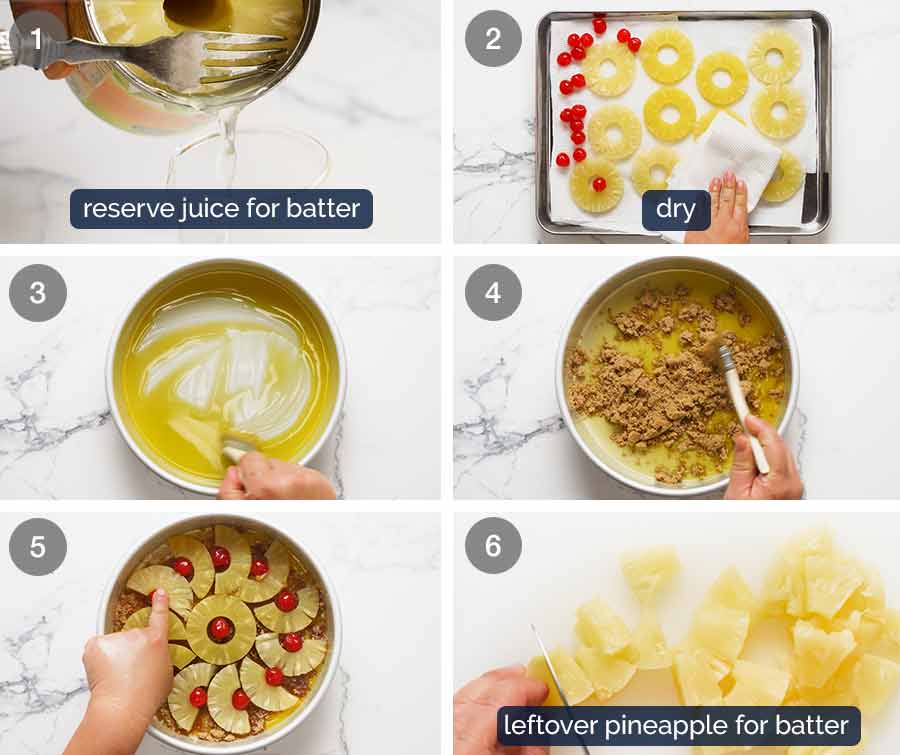
Pineapple juice for batter – Measure out 1/4 cup pineapple juice and set aside for the batter. Reserve the remaining juice for smoothies or cocktails!
Pat fruit dry – Pat the pineapple slices and cherries dry;
Melted butter – Pour melted butter in the cake pan and brush it over the bottom and sides;
Sugar – Sprinkle the brown sugar around the base. No need to be too even here, the caramel will just move around once melted;
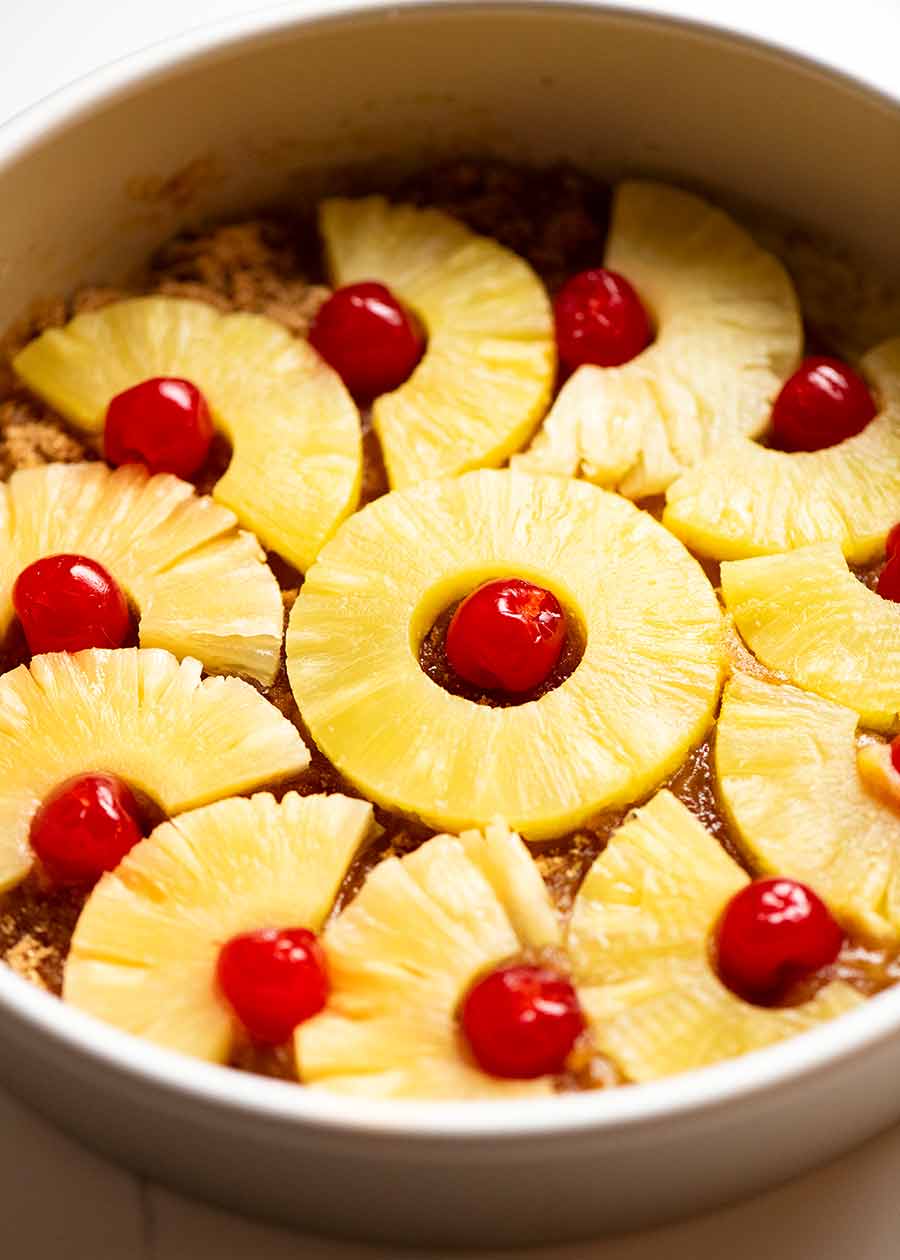
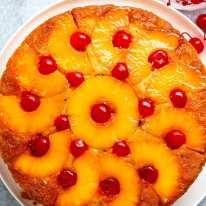
Arrange pineapple slices – Cover base with pineapple slices. You can arrange as depicted, using one whole ring surrounded by halves (giving most coverage), or you can just use whole rings. Decorate with cherries, either just in the pineapple ring holes (as depicted), or with extra ones filling gaps between the pineapple. Press pineapple and cherries down firmly. This reduces the amount of caramel that adheres to the final presentation surface when baking so you get better vibrant yellow and red colour pops (that are not tarnished by caramel); and
Chop leftover pineapple – We’re going toss these into the batter. Note: you may not have leftover pineapple, it depends on the size of your can(s)!
Part 2: The batter
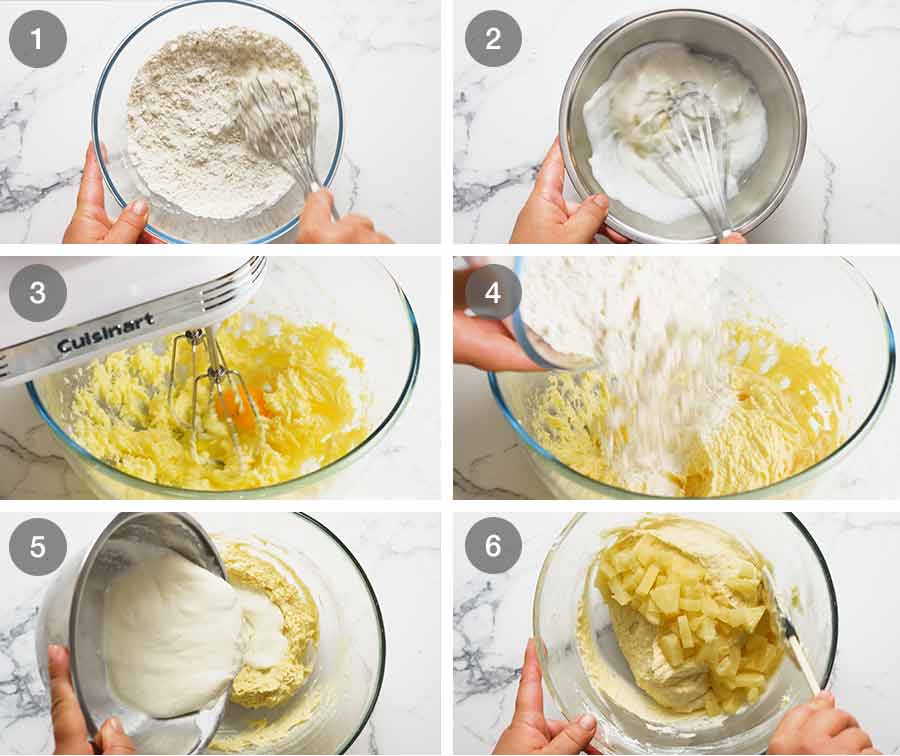
Dry ingredients – Whisk them in a bowl;
Wet ingredients – Whisk the milk, sour cream and pineapple juice in a separate bowl;
Cream butter and sugar – Then in a third (and I promise, last!) bowl, beat the softened butter and sugar for 2 minutes until it’s light and fluffy;
Add flour in 3 parts – Use a rubber spatula to fold the flour through rather than an electric mixer. This will ensure you don’t over-mix the batter which leads to a tough cake crumb;
Alternate with Milk Mixture (Wet ingredients mix) – Between each addition of the Flour Mixture, add the Milk Mixture in 2 parts. So: 1/3 flour, mix, 1/2 milk, mix, 1/3 flour, mix, 1/2 milk, mix, 1/3 flour mix. This might seem tedious to you at the time, but just wait until you see how soft the cake comes out!
Stir through pineapple pieces – Do this right at the end. Stir just to disperse the pineapple through.
Part 3: Baking
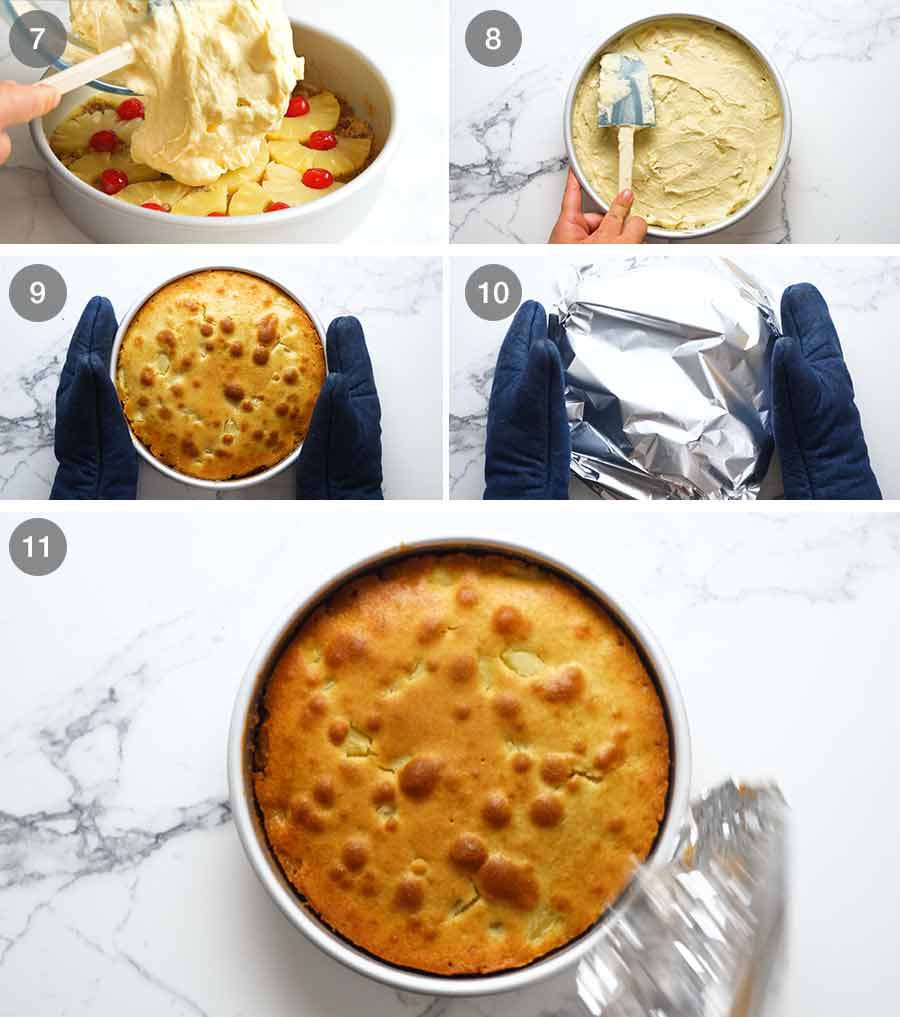
Scrape batter into cake pan over the pineapple;
Spread to level surface;
Bake uncovered for 30 minutes at 180°C/350°F (160°C fan);
Cover with foil, then bake for a further 15 minutes;
Check cake is cooked – Remove foil and check to ensure the cake is cooked by inserting a toothpick into the centre. It should come out with just crumbs on it, no raw batter!
Part 4: How to turn out Pineapple Upside Down Cake
There is nothing to fear with this step! And most importantly, I have NEVER had problems with the pineapple sticking to the cake pan – and as you can see, I do not use a non-stick pan!
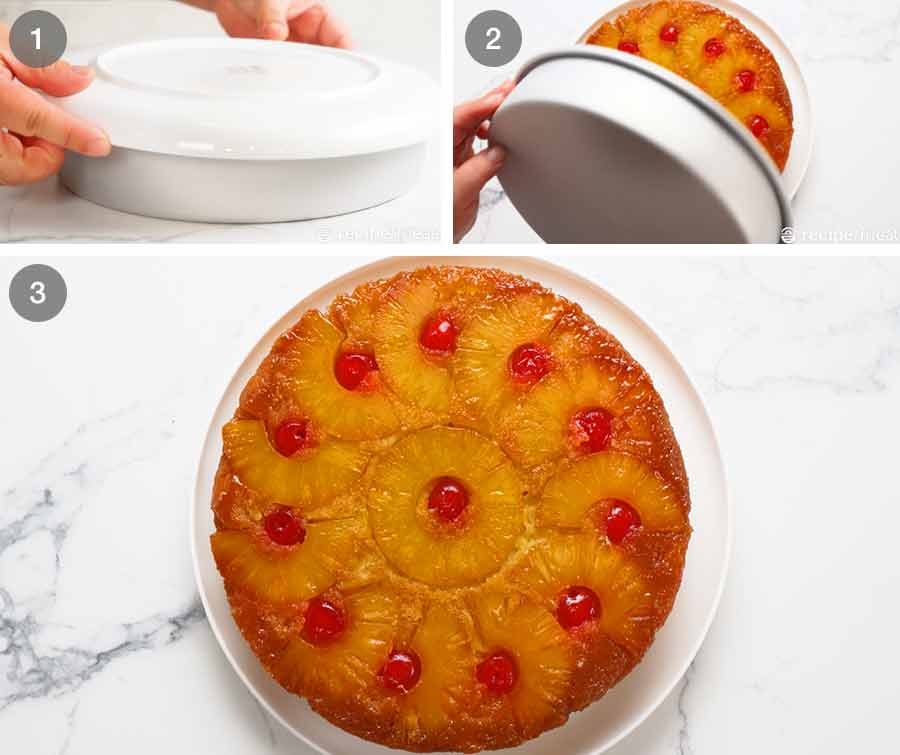
Cover cake pan with a plate or serving platter;
Flip with confidence – now is not the time to hesitate! 😂
Lift the cake pan off slowly and … voila!
PRO TIP: If, when lifting off the inverted cake pan (slowly!), you can tell that the base is sticking, tap the base gently and/or shake gently. This will help loosen it. That said, with the amount of butter used in the base to make the caramel “sauce” that soaks into the pineapple topping, it is highly improbable that you’ll encounter sticking issues. But stranger things have happened in life!
This is not a very tall cake. It stands around 4cm/ 1.6″ tall using a 23cm/9″ cake pan. A smaller cake pan would make it stand taller but it would take too long for the middle of the cake to cook before the caramel on the base becomes too brown, I think.
Also, at this height, you have a nice ratio of cake to caramelised pineapple.
Pineapple Upside Down Cake will keep for 5 days or so in the fridge. The crumb will get a bit more soaked with those caramel pineapple juices as it sits. But nobody complains, that’s for sure! – Nagi x
PS. This is what I was listening to as I was typing up this post. Just in case you also want to get into the retro spirit. 👯♂️
Watch how to make it
Hungry for more? Subscribe to my newsletter and follow along on Facebook, Pinterest and Instagram for all of the latest updates.
Pineapple Upside Down Cake
Ingredients
Topping:
- 565g/ 20 oz canned pineapple slices in juice (not in syrup, Note 1)
- 12 – 18+ maraschino cherries (Note 2)
- 60g/ 4 tbsp unsalted butter , melted
- 1/2 cup brown sugar
CAKE:
- 1 1/2 cups flour
- 1 tsp baking powder
- 1/4 tsp baking soda (sub 1 tsp baking powder)
- 1/4 tsp salt
- 1/3 cup milk , full or low-fat
- 1/4 cup pineapple juice , reserved from can (under Topping ingredients)
- 1/4 cup sour cream , full fat (sub plain yogurt)
- 1 tsp vanilla extract (or essence)
- 115g/ 1 stick butter , unsalted, softened (to 18C/64F, Note 3)
- 3/4 cup white sugar
- 2 large eggs , at room temperature (Note 4)
- Any leftover pineapple , chopped (Note 1)
Instructions
- Preheat oven to 180°C/350°F (160°C fan).
Pineapple decorative top:
- Dry fruits: Line a tray with paper towels or a tea towel, then place pineapple and cherries on. Pat dry with paper towels.
- Butter: Pour melted butter into a 23cm/9" cake pan at least 5cm/2" deep. (Not springform, as they'll leak.) Brush butter up the sides.
- Brown sugar: Sprinkle sugar over the base, roughly spreading it out (use the brush).
- Arrange pineapple: Place one pineapple ring in the centre, then surround with either halved pineapple rings (as pictured), or whole ones.
- Decorate with cherries as desired. Most people just put them in the middle of the pineapple rings.
- Press cherries and pineapples down firmly so they are in direct contact with the base of the cake pan – so you get vibrant red and yellow colour pops at the end, not tarnished by caramel. (Note 5)
Batter:
- Flour Mixture: Whisk flour, baking powder, baking soda and salt in a bowl.
- Milk Mixture: Whisk milk, sour cream, pineapple juice and vanilla in a 2nd bowl.
- Cream butter and sugar: In a third (final!) bowl, beat the butter and sugar for 2 minutes on speed 7 (handheld mixer) until fluffy.
- Eggs: Add eggs one at a time, beating for 20 seconds in between.
- Add Flour Mixture then Milk Mixture, alternating: Add 1/3 of the Flour Mixture, then mix in using a rubber spatula. Add 1/2 the Milk Mixture, mix in. Add half the remaining Flour Mixture, mix. Add all the remaining Milk Mixture, mix. Then mix in the last of the Flour Mixture. Stir in the leftover pineapple pieces.
- Fill pan: Spread batter over pineapple layer, smooth and level the surface.
- Bake: Bake for 30 minutes. Remove, loosely cover with foil, then bake for a further 15 minutes until a toothpick inserted into the centre comes out clean.
Turning out cake:
- Cool 20 minutes: Remove cake from oven and leave inside pan to cool for 20 minutes.
- Flip! Run a butter knife around the inner edge of the cake pan. Put a plate or serving platter over the cake, then flip. Tap base / shake pan gently then lift slowly. Voila!
- Cool completely before serving.
Recipe Notes:
Nutrition Information:
More classic cakes
Life of Dozer
Cake, anyone?


I love this cake. Always turns out beautifully.
There are 2 sets of instructions with this recipe. The first set never tells you to add the eggs or the vanilla. Please update the instructions.
Thank you Nagi.
Substituted fresh pineapple and orange juice for canned with juice. Also, fresh blueberries for candied cherries.
It was lovely.
This cake came out amazing! It was so light and fluffy, and incredibly moist. The only things I did differently: I used 1/2 cup of white sugar and 1/4 cup of brown sugar in the batter, instead of using all white sugar. I used 3 eggs because they were small (I’m in the US). And I did use a 9X13″ pan, which worked just fine for me using the same cook time exactly, it did not need a minute more.
Very very good! Not to hard to make and I love that the cake recipe was easy to follow and wasn’t just “1 box yellow cake mix” lol.
This is sooooo much better than prepared mixes and no preservatives. The cake was moist and I love sour cream in cake recipes. I wish I could share the picture because my cake was nice and fluffy and beautiful
Everyone liked it. If I were to make it again i would add the cherries after baking as was still quite brown on top. Thank you for this recipe 🙂
I baked this cake for the first time to take to an event, although I baked a second one to keep. I really appreciated all of your details in the notes. I purchased a springlock 9″ pan at a thrift store because I didn’t have a 2 inch high pan. Your note about it leaking prevented a disaster. So I used a 9″ cast iron pan with a 2″ edge. It was perfect!! For the second cake, that I was keeping, I used a 9″ square baking dish with a 2′ rise. It is not quite as pretty but it tastes just as good in the square pan.
Fantastic! Not to mention beautifully moist and impressive to look at!
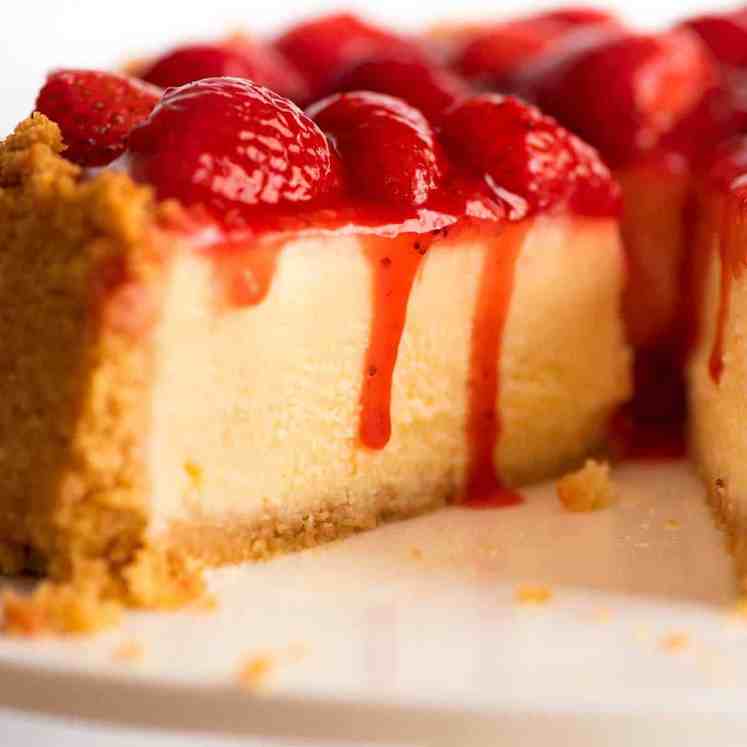
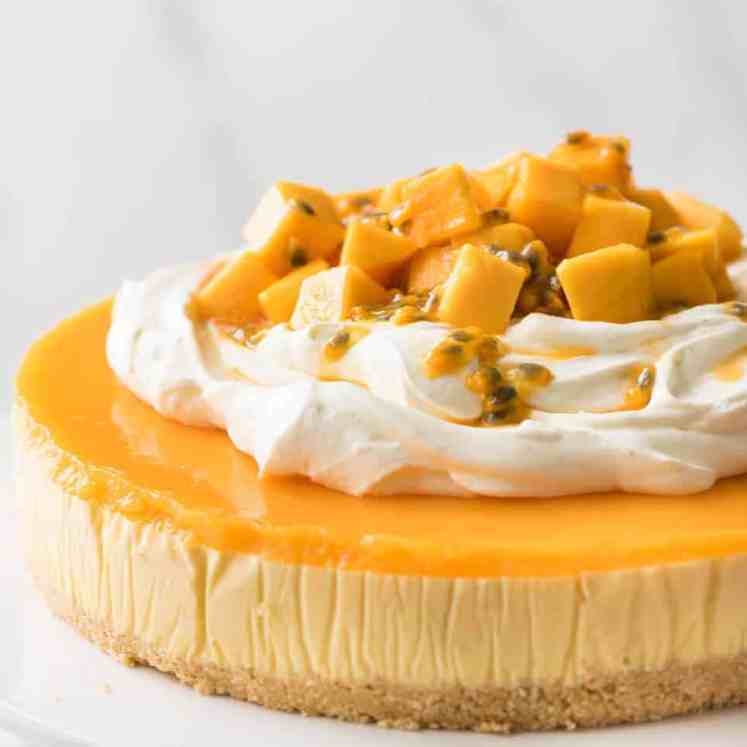
Hi Nagi, I’m a 12 year old and I’m really enjoying making your recipes. We’ve bought your cookbook and I’ve made the lemon cheese cake too many times to count! Thank you so much for your recipes, they have got me into cooking! Best wishes, Evie.
Hi! I want to make this recipe, however please can you clarify about the eggs. You say large eggs are around 50-55g and you shoukd use two, but then you say to weigh eggs and use 200-220g in total? Please can you advise.
Thanks
Want to try to make what I can
I really wanted to make this but can’t find the size of pan it calls for so went on to a different recipe.
Brandi it says 9″ cake pan in the third step!
Recipe states to use a 9″ pan. It’s a bit hidden, but it’s there in Step two. You could also use another size pan, and just monitor doneness accordingly (toothpick test)
Hey can you please help me I’ve got the case prepare I just need to turn it over and do the shopping cuz I didn’t put you pineapples in the bottom and what kind of shopping can I put on it I’m good two cases in the middle I’m going to put pineapples and the boys how do you make rice
While I’m a decent cook, I’ve never been a baker. I had a few dessert recipes I’d make and when I moved to Florida from a Northern climate, none of these turned out I’ve assumed because Florida is very humid. So over the years, I’ve just never baked. Recently at a restaurant, they served a pineapple upside cake, which reminded me of growing up in the 60’s and 70’s. So I did a search and found this wonderful recipe and blog. This cake turned out amazing. My husband of 23 years thinks I’ve been lying to him that I’m not a baker after having this for dessert. I’m back on here searching for other cake recipes because this cake turned out so perfect. So moist and just sweet enough but not overly sweet and such a pretty looking cake too! Thank you for your recipes, I’m a fan!
I don’t bake ever. But this cake remind me of Haitian Upside down cake, so I made for my family on New Years Eve. only this recipe is easy and much much healthier. Everyone enjoyed it.
Aweome cake and easy to make
Very tasty result. Recipe very complete. Some unexpected, quirky things to in middle. Read and prepare carefully. The recipe does not explicitly state mixing the eggs in anything.. It only made sense to me to mix the milk mixture, and cream-butter-sugar mixes together. Than do the eggs. Anyway, this worked well for me.
I’m not a great cook when it comes to desserts but this was pure perfection. We got impatient & ate it whilst it was still warm, it gave me steamed golden syrup pudding type vibes. So good! The instructions + video are idiot proof.
Can this be made in a bundt pan?
I made this Pineapple Upside Down cake for Thanksgiving this year. I followed the recipe exactly and my cake came out perfectly! It is beautiful and delicious! Thank you Nagi! I’ll try another of your recipes for Christmas! 🙂